Fragmented Practice - my Vignettes Quilt
- Gwen Edwards
- Dec 26, 2021
- 9 min read
Updated: Mar 6, 2022
I started Heidi Parkes' Vignettes Quilt quilt-a-long on 20th September 2021, the Harvest Moon, with the intention of completing it, as Heidi proposed, with the October Blood Moon. But, things change, and this quilt needed more time! As I write this at the end of December 2021, I am still stitching. This blog tries to capture some of the things I have learnt, mainly about myself, and my quilting practice!

I am relatively new to quilting. After 4.5 quilts + 3 smaller wall-quilts, this is the first time I feel I have followed a pattern. I admire the way Heidi's patterns are very flexible, and fluid - they provide a framework, and your choices lead to incredibly different quilts.
The Vignettes Quilt pattern combines a few things which intrigued me: it uses various art concepts (Elements of Art, Post Modern Principles of Art, Principles of Design) to expand your vocabulary and knowledge, supporting and enabling more educated, sophisticated and expansive commentary on, and conversations about, the art found and expressed within a quilt. And by using often pre-existing vignettes, the pattern enables you to construct the quilt top by piecing one vignette to another, rather than the more additive-applique-style method of stitching items on top of a solid piece of fabric.

The QAL enabled a supportive environment to share ideas, and seek suggestions. The kick-off zoom was a joyful way to meet fellow quilters starting out on the same journey.

In advance of the first zoom call, I had printed off Heidi's pattern, sewing the pages together with a blunt needle on my sewing machine - it found it useful to be able to read it through and scribble notes as I went. I had also written out all the 'special words'* we were going to be working with, so that I could pin them to each block - as Heidi shared, it is easy to lose track of which vignette represents which word, not that it particularly matters, but I felt I wanted to have that awareness as I stitched, so that I could ponder the meaning more significantly. Heidi's idea to attach labels ensured "efficiency", a very welcome concept to consider!
* if you would like to print that list of words out too, to save you some time, you can download it here.

Fragments of practice
As I was thinking about which vignettes to use that would best illustrate each concept or principle, I realised I had many small pieces of work in my scrap box - experiments, pieces made on workshops, maquettes, special fragments of cloth. Perfect. I pulled them all it, and then considered how they may, or may not, illustrate each key word and concept.
There were some concepts which were absent - should I make a new piece, or just go with that gap? Others where I had multiple pieces which beautifully illustrated the element - go with all of them, or edit and select fewer? As I navigated these multiple decisions, I also considered how they might all fit together cohesively (or should there be deliberate jarring?), and how to configure them together, trying to find balance. Tricky! Reviewing ideas via the QAL and images posted on Instagram, I found comfort and reassurance in seeing that others also found this stage quite difficult!

Eventually, the layout settled.
Then more decisions: pinning, and deciding on raw edges or turned, and refining angles and intersections.

Connected modules
Without a solid piece of fabric to which to pin things to, I found it difficult to hold each vignette together securely and maintain the angle I wanted. A well-timed QAL zoom with Heidi enabled us to talk this through. Breaking the quilt-top down into sections, treating them as "modules", really helped: sew one section together, then, one module to another, much easier!

I sewed some sections together by hand, others on the machine. And as some pieces of fabric were very thin, I sewed those to a backing piece to bring stability - and to help where a neighbouring piece of fabric was especially robust.

A quilt maquette and other vignettes
The central hug, my recontextualization vignette, was designed to be intentionally interactive. This is the maquette I made for the 4th Hug Quilt - the quilt remains in my head for now, but the plan is that you will be able to place your hands inside the quilt and experience the inner workings of someone else's hug.
Other vignettes also seemed to want to remain "accessible", creating pockets of playful elements of interaction.
With the hybridity vignette for example, I added small magnets, so that it can lie flat, or be popped open, to reveal a pocket and part of the reverse of the quilted square.

This square hybridity vignette was made as part of the #ScrapSwapCommunity my account-abil-a-buddy Sam @threads_of_my_life and @medingchloe organised - I have blogged about that separately, as that has a little life of its own! "One thing leads to another."
The text vignette uses a piece I made on a workshop in May 2021. @zakfoster.quilts, @heidi.parkes / @handyogaclub and the always fabulous Ali from @themakerie ran another wonderful #PlayfulPause - Zak's "sewing with your eyes closed" exercise is definitely about the journey!
For my appropriation vignette - a pre-existing object or image with little transformation of the original" - I chose this playful image of "Blanchard's ballon", taken from a print in an old family Lexicon. (I am fascinated by this design: did it actually fly? What did those four wings do?!) This vignette is a thermofax printed image. I took a photo of this page from the Lexicon. From the black and white version of that photo, Paula Tew in Bath made a thermofax screen for me in 2014, and this was a test piece leftover from a printing workshop I went on with her. (Paula doesn't seem to be on IG?)
Connected fragments
October 2021: I have finished stitching the vignettes together. There is a definite sense of "up-ness" going on in the right-hand corner. With all the sections stitched together, I started to intuitively stitch an organic wheat-ear stitch in blue embroidery floss, and one thing led to another, until it wound its ways across the entire piece.

I embroidered the arms and pockets, stitching carefully to ensure their 3D elements were not constrained. I particularly like the way these blue stitches work inside the "window" with the hug vignette.

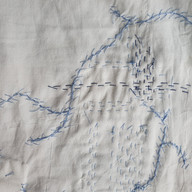
Eventually, by the "Cold Moon" of December 18th, the mycelium-like blue stitches seemed complete. I appreciate the way this intuitive stitching has brought some sense of coherency to the quilt top. On turning the quilt top over, it's interesting to observe the layers of mark-making and the surprise as they disappear where one piece of fabric joins another. The organic wheat-ear stitches have a raw, brutal feel to them on the reverse!
Quilting
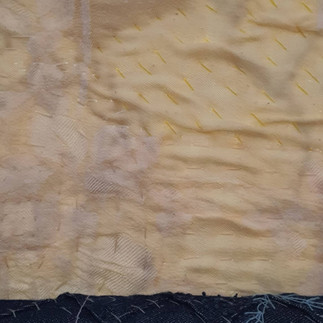
To expand what I could learn, for the backing I decided to use two pale yellow table cloths, accidentally washed on too hot a wash, and impossible now to get flat - what kind of texture would they add when quilted? And an old sheet for the batting - keeping things quite thin, and un-quilty.
I basted with curved safety-pins, then replaced them with long tacking stitches.
Hand quilting frame
Time to set up the hand-quilting frame I had bought via Facebook Marketplace in October, manufacturer unknown. It came with 2 sets of poles - the 2.5m long poles for a king-size quilt were quickly put into the attic out of the way!
This is a "2-rod system on top" hand quilting frame, and it all slots together easily - but once it's up, with the quilt attached, it's up.
Previously, I have only hand-quilted without a frame or hoop - either oven-glove style in my lap, or on a table using a heavy book for tension, as Heidi Parkes does. I wanted to explore quilting on a frame to understand how it might change my stitches, tension and work.

Set-up and tricks for next time
Before setting the frame up, I swept the floor first, but next time I will definitely scrub it, as the fabric seems to have picked up some extra marks in the process!
wash the floor!
mark the centre-point of both short ends of the quilt at, and the centre of the poles
fix the "far end" of the quilt to the webbing on the pole furthest from you, with a staple gun, ensuring the centre of the quilt is in the centre of the pole - staple from the centre out to the edge
keeping the fabric taut, and smooth, evenly turn the quilt onto the far pole
when almost fully wound, fix the front edge of the quilt, nearest to you, to the pole closest to you, with the staple gun - again, stable from the centre, out
turn the poles until quilt is taut, tighten the screws on the ends
turn the pole a little more, and add more tension - it should bounce a little
you may find as you stitch that you have to retighten it every so often
add more webbing to the sides - I started by stitching them, but then switched to a staple, as you have to rejig these as you roll the quilt on.
Alex Anderson has a useful video where she talks about different hand quilting frame systems. She also describes the frames her Dad, Joe Sladky, used to make - I would love to know more about them! I've blogged about what I have discovered, but I am keen to know more!
Quilting on the frame
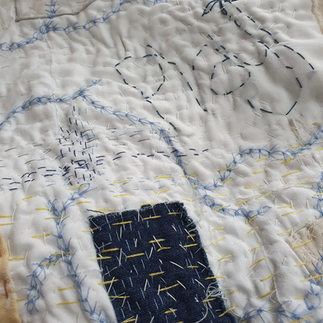
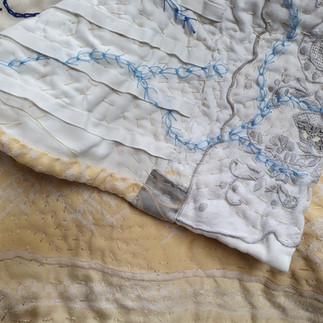
Its lovely to be able to see a bigger surface area as I stitch, and not to have to use one hand for tension. I'm still mixing-things-up with stitch direction! I'm deliberately reducing the stitching in some parts - for example the white pleating of my layering vignette, so they keep their freedom to move - and avoiding some areas entirely - keeping pockets open and "useable". I'm enjoying the syncopated juxtaposition of different stitches, one layer interacting with another.
For the quilting, I'm using various crochet yarn and 3 and 4 ply silks and cottons - I have a box of threads gleaned from charity shops and markets over many years, and hope to use up some of the smaller balls on this project.
I'm finding it odd not to be able to just flip the quilt wip over, and take a quick look at what's going underneath... but some sneaky shots underneath the frame reveal small glimpses of what's going on! The backing fabric is 2 old tablecloths, accidentally washed too hot, so they have puckered and will no longer lie flat - I'm intrigued to see how much will "quilt out" and how many wrinkles I can trap!
Still plenty more to stitch, and lots of quirky sections to come, so I'll add more to this blog post in the weeks ahead!
January 2022: More stitching on the frame. Carefully avoiding some areas where I want to retain a pocket (I added a magnet to this one, before quilting).
Exploring ideas with stitch direction and interactions with shapes within the fabric vignettes.

February 2022
With most of the quilting complete, I started to think about some of the trickier areas: the unquilted pockets, and the final section, where I intended to wrap a heavily embroidered grey and white linen table runner over the edge, and back on itself, so that it appears on the two sides. And how to handle the binding. Time to remove the quilt from the frame, and sew the rest in my lap.
Unstapling the fabric from one end, I kept the bulk of the quilt rolled onto one of the poles, to keep some tension, as I smoothed out the fabric on the cutting table. I cut the short edge, and carefully folded over the table runner, so that it lay on both the front and the back of the quilt, ensuring that the internal fabrics butted up to the folded edge. With this pinned in place, I then unrolled the entire quilt, removed the staples from the second pole, and could consider how much to trim away and leave for the binding.
I bound 3/4 of the quilt, using the self-binding method Heidi Parkes teaches, and using various vintage perle cottons from my stash.
The next step was to carefully quilt the reverse of the pocket sections, ensuring the pocket remained useable - in hindsight it would have been far easier to add these afterwards! Some sections were just too complex to quilt - the reverse of the arms for example.
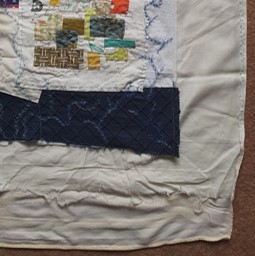
This just left the final section, with the folded over table runner. I quilted the remaining sections, stitching through even more layers now, plus the extra density of the embroidered elements of the table runner. I allowed my stitches to have some fun following pattern and shapes in the layers of cloth and stitch. The number uses a spare QuiltCon22 label.
The most complex issue remaining was how to neatly bind the two long edges so that they lay nicely against the linen table runner, and filled the corner. Resolution came with a few extra patches of fabric.

As I stitched these final elements, the world watched the Russian invasion of a peaceful nation in shock.
6th March 2022: Done? Not sure. Done for now.
I will use this quilt as an extra layer when I work at my desk. This project has brought together samples, test pieces, favourite scraps, and ideas into a single piece of fabric - previously with intention, but unusable, now, gathered together, these fragmented practice pieces have a purpose.
Useful links
Check out the Heidi Parkes Vignettes Quilt Pattern here , and check out her QAL blog post
Print out the "labels" for the vignettes, here
Instagram #VignettesQuilt and @Heidi.Parkes
















Commenti